[ad_1]
Do you have strong opinions about things like the best TV shows, movies, songs, colors, characters, and literally anything else? Do you want to know everyone else’s thoughts or just stir up some drama?

Bravo
Good. We’ll teach you how to make that happen right now by making your very own BuzzFeed Poll quiz.

Bravo
In this post:
⭐️ How to create a poll quiz, including adding questions and answers
⭐️ Changing the colors within your quiz
⭐️ Adding photos to the questions and answers in your quiz
🤔 Need inspiration before you start? Here are the latest poll quizzes on BuzzFeed!
Anna Kopsky/Canva
1.
Once you’ve signed up for an account, head to community.buzzfeed.com/post. Creating a post can be done on a desktop or laptop.
2.
Here you’ll see our CMS, aka our “Content Management System,” aka your draft. It’ll look like this:
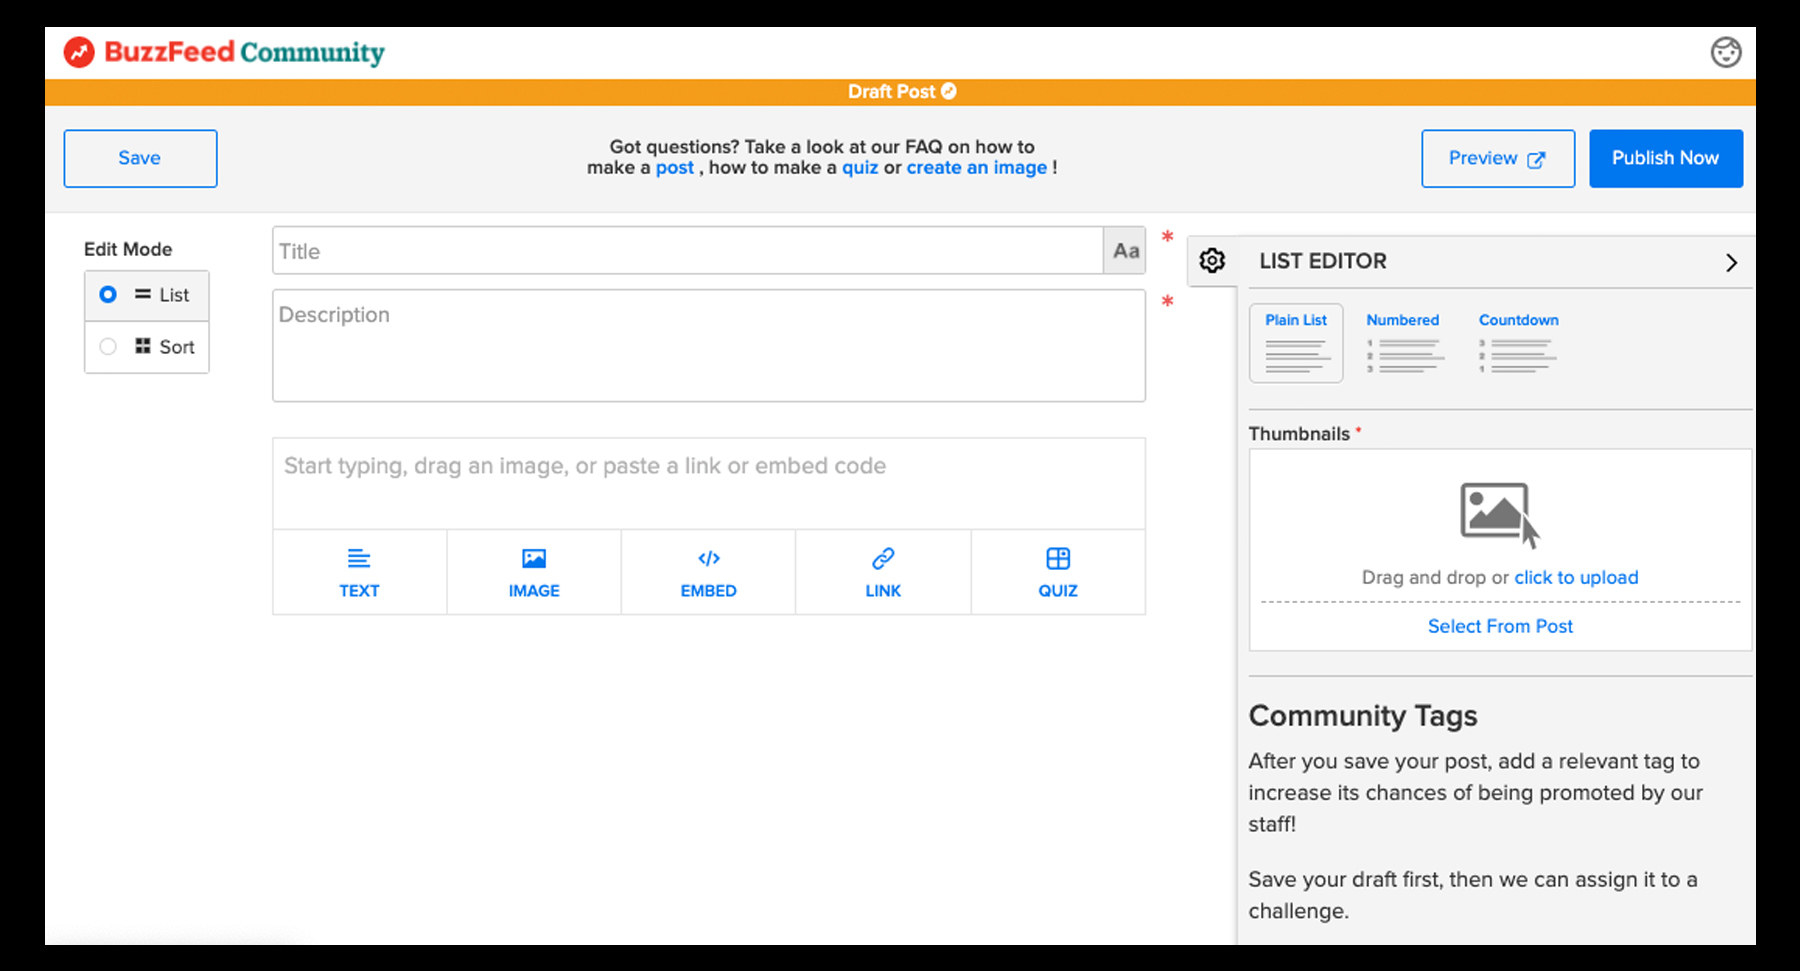
BuzzFeed
3.
Add your headline and description to your quiz. Then, select the type of quiz you’re looking to make. In this instance, select “Poll.”

Anna Kopsky/BuzzFeed
🚨 Don’t forget to hit “save” throughout your entire quiz-making process! This ensures your masterpiece won’t get lost. 🚨
Anna Kopsky/Canva
4.
Once you’ve opened the quiz maker, add your questions and answers following the steps below.
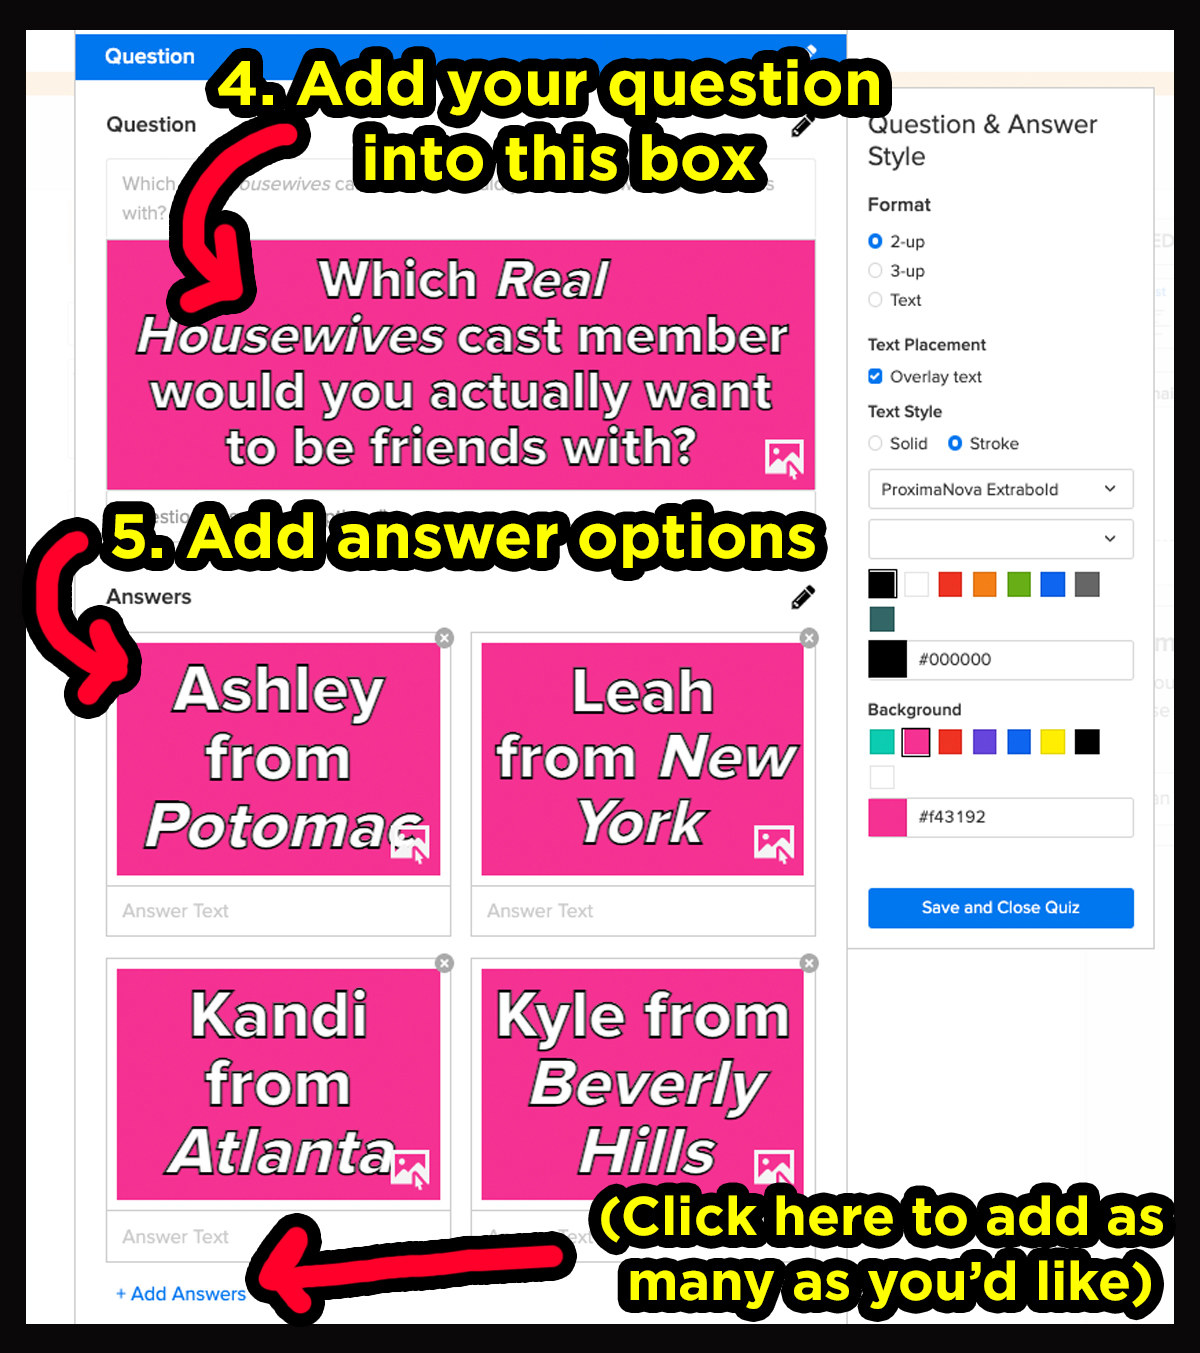
Anna Kopsky/BuzzFeed
5.
Next, press this button to save! This ensures none of your work will get accidentally deleted. You’ll only be closing the box you’re working in, not the entire page.
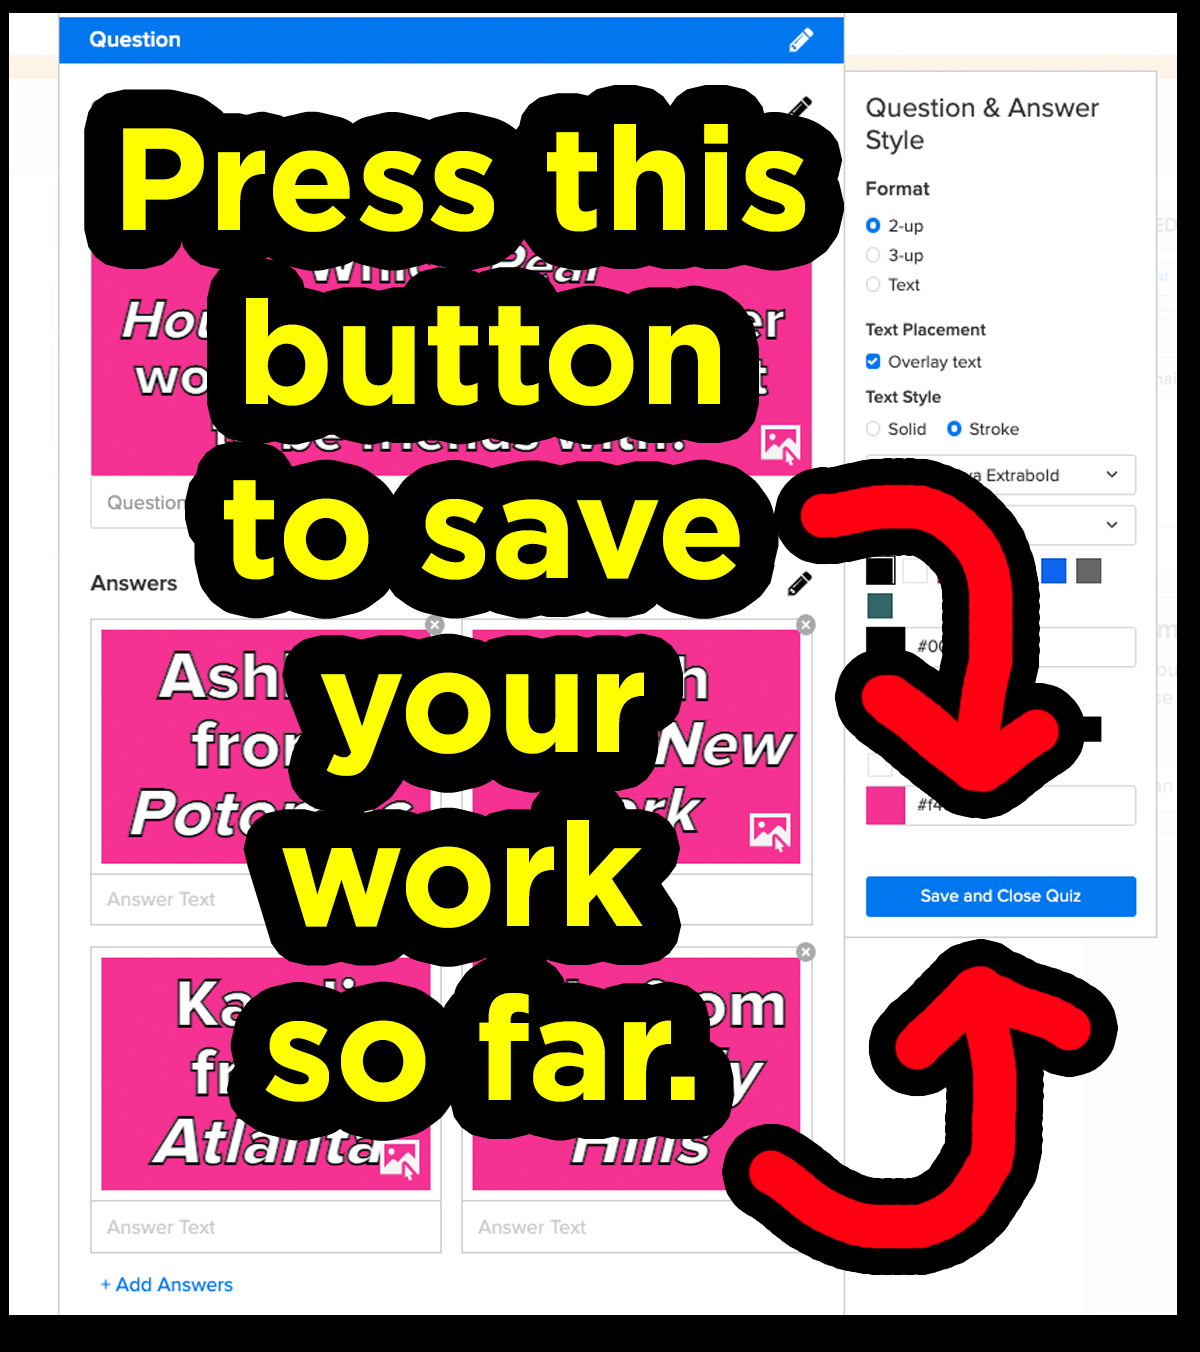
Anna Kopsky/BuzzFeed
6.
Once you’ve saved this, also hit the “save” button in the upper-right-hand corner of your draft.
7.
To add more questions, you simply start the above process again and follow the steps until you’ve added them all! Again, don’t forget to hit “save” in the upper-right-hand corner of your draft throughout your quiz-creating process.
Anna Kopsky/Canva
While adding your questions and answers, you may notice this box titled “Question Style” pop up on the right-hand side. This tool allows you to change the colors and font sizes and types within your poll.
Below is a step-by-step guide on how to use this tool. The numbers in this image correspond with the text below the image to help you out!
8.
How to use the color and font tool:
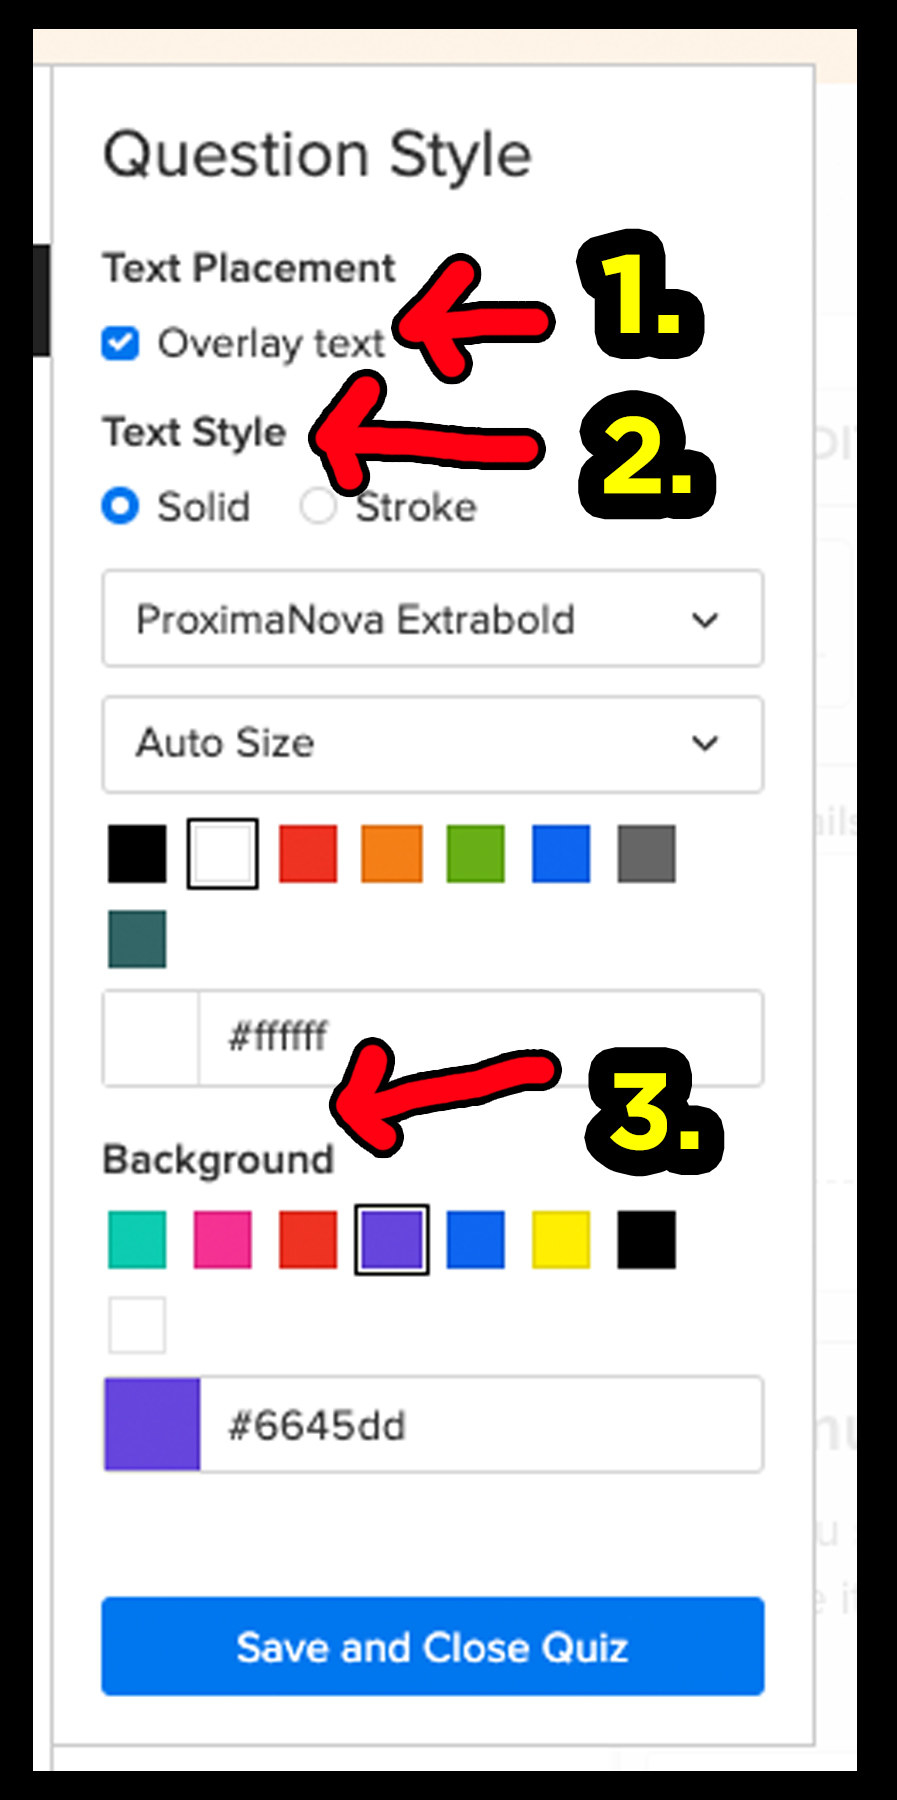
Anna Kopsky/BuzzFeed
1. Text placement: Select “overlay text” if you’d like your questions and answers to appear within the default question box, or if you’d like them to appear as regular text. Give it a try within your draft to check out how these look and choose which style you prefer!
2. Text style: If you select “solid,” your question text will appear as the default style you see when creating the quiz. If you select “stroke,” an outline will appear around your text. Keep in mind this option is only available if you select “overlay text” in section No. 1.
To select a color for your text, click on a color square under the “Auto Size” drop-down box. If you’d prefer to add a color that isn’t featured, you may add a color code yourself in the rectangular box that says #ffffff.
In this section, you may also change the font and size of your text.
3. Background: Here you may select the background color of your question and answer boxes. Click on the box(es) you’d like to change, and then select a color square. As in section No. 2, you may add a color code if the color you’d like isn’t already an option.
Anna Kopsky/Canva
9.
To start, add your question and select the font and style of your lettering. Click on the icon of a photo in the bottom-right-hand corner.
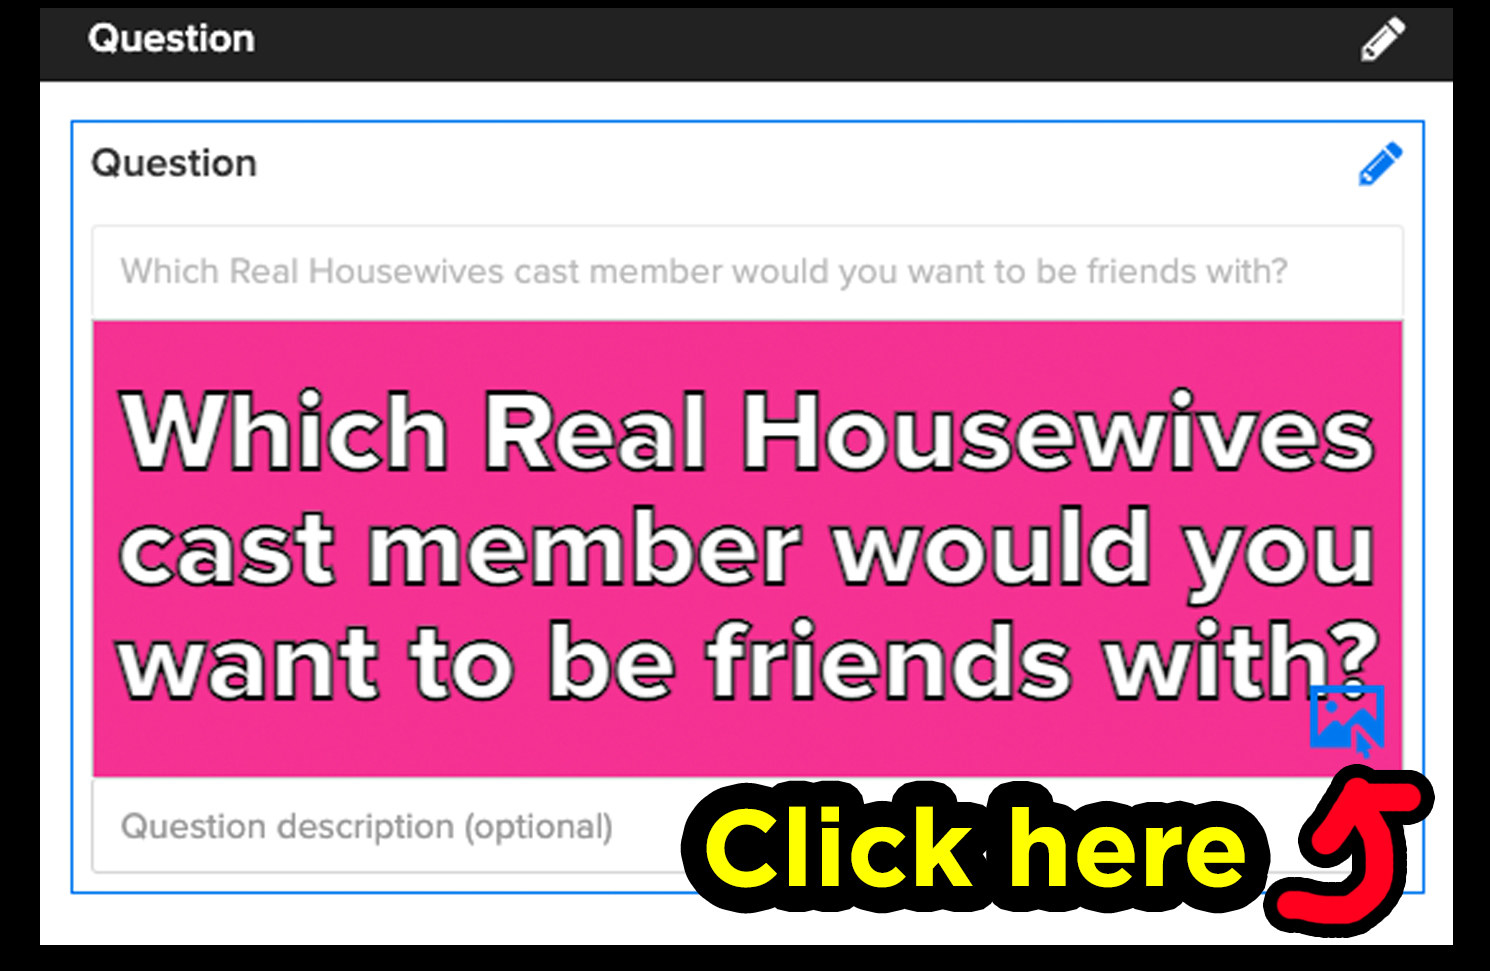
Anna Kopsky/BuzzFeed
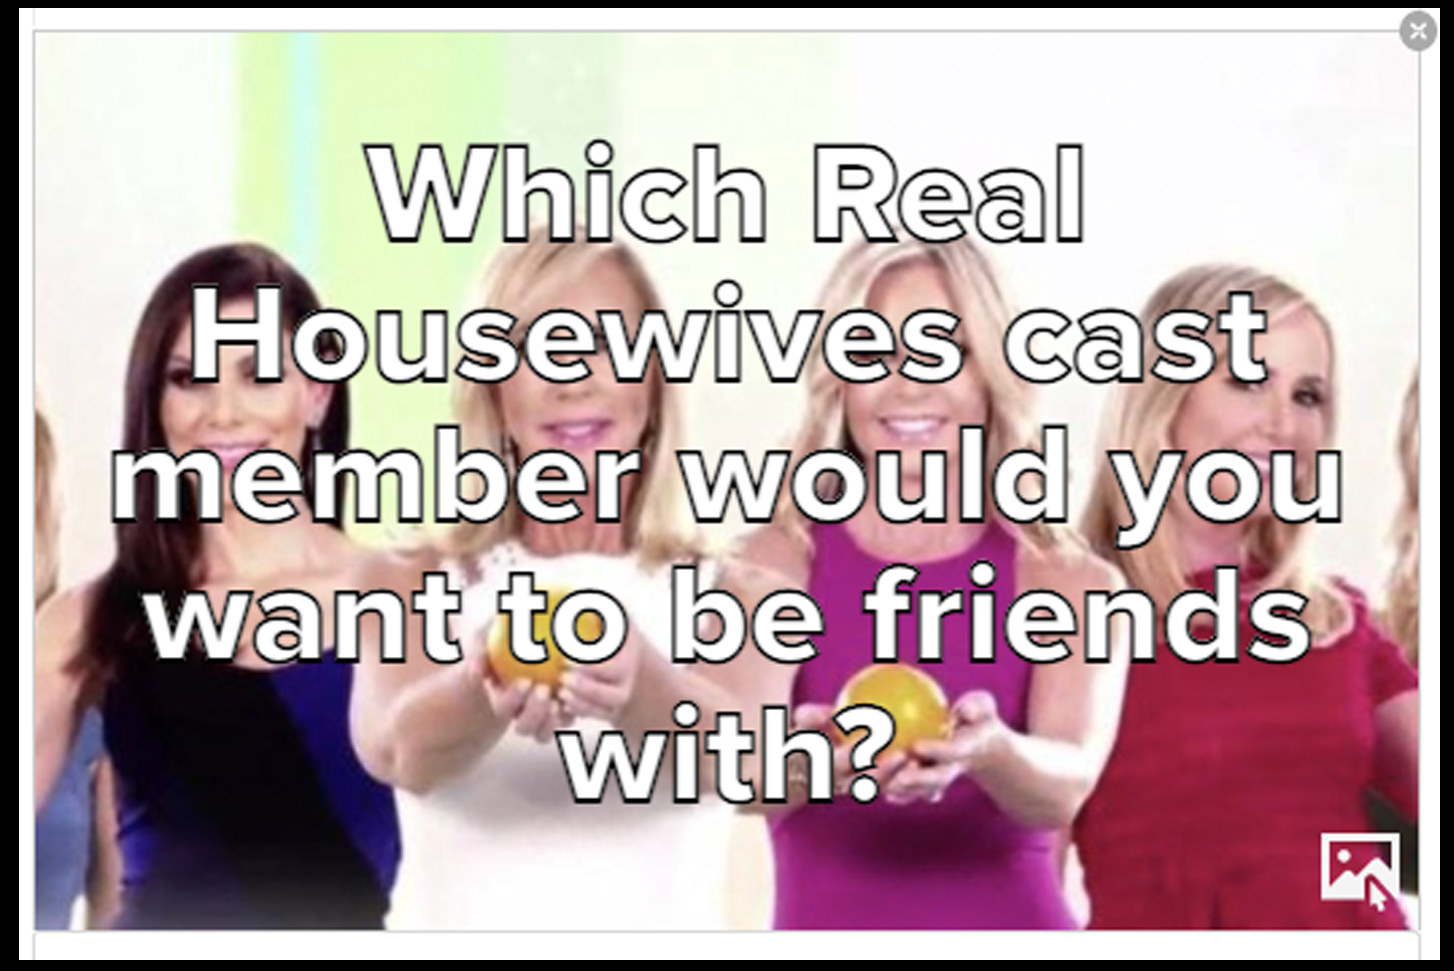
10.
Select an image from your computer and upload it. After you do so, the image will show up behind your text. You can also select “overlay text” in the Question Style box (explained above). This will put the text above the image as opposed to over the image.
Bravo/BuzzFeed
Follow these same steps to add photos to your answer boxes, and don’t forget to hit save throughout your quiz-making process!
11.
Then add sources to your photo. For steps on how to do this, head to our simple Photo Resource Guide.
Anna Kopsky/Canva
12.
For steps on how to add thumbnails and choose Community Tags, check out steps 10 through 14 on our main quiz how-to guide.
13.
Finally, hit “publish now” in the upper right-hand corner, and a Community Editor will see your post! All posts that are published will be considered for promotion to the BuzzFeed homepage.
To learn how to make other types of BuzzFeed quizzes, check out our main quiz how-to guide!

Anna Kopsky/Canva
[ad_2]
Source link


